![]()
Module Transformation Begins
Photos by Glenn Koproske March 3, 2006
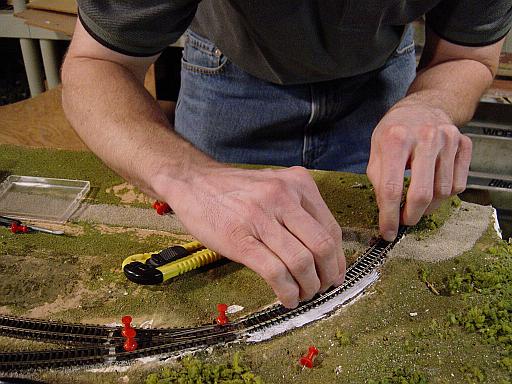
| The tail siding trackage is replaced. A new no. 4 switch is pinned down, and the flextrack is aligned from there. White glue is used to secure it. The roadbed has already been sanded. |
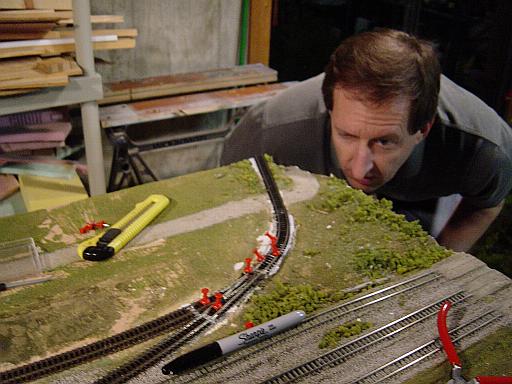
| The best way to ensure proper track alignment is with the Mark IV Eyeball Method. Here, Tim O'Fallon makes certain that his track laying is perfect. |
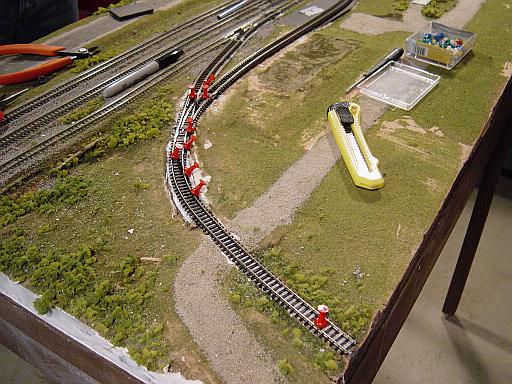
| The new siding is complete, and push pins hold it in place on the cork roadbed until the glue dries. We use traditional cork roadbed, traditional Atlas flextrack, and high performance white glue such as Crafter's Pick The Ultimate. On an N-Trak module, these materials are proven to be bulletproof. None of that high falutin' code 55 track here. |
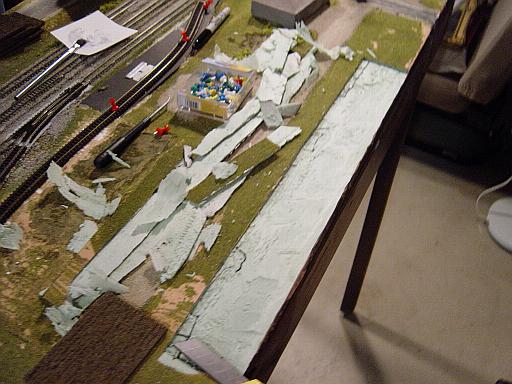
| A utility knife was used to remove the top 1/8" of the foam board module base in order to accomodate the thickness of the plowed field resin castings. Looks just like potato peelings. |

| The plowed field castings are glued into place with Liquid Nails. Later, wood fence posts will outline the farm field. We checked the satellite photo of Sunfield, Illinois, and there is indeed a plowed field in this area. |
| You will recall that we used white putty to repair the front edge of the module. It is now time to get rid of that annoying white color. The profile is vertical from the wood frame, so the module must be laid on its side to make the edge parallel to the floor. Scenic ground foam was sprinkled on on the surface after a coating of glue was brushed on. All of this keeps the ground foam from sliding right off. This stuff was pressed into the glue with a finger, and no overspray of watered down glue was needed. A vaccuum cleaner removed the excess after the glue dried. You would use the same module-tilting method to apply loose scenery to a mountain or hill. Notice that the module frame has been taped first. |
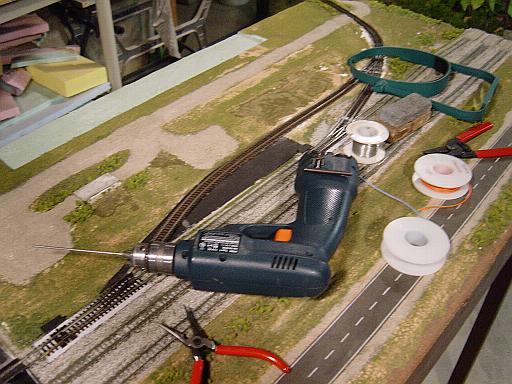
| It is time to drill holes for the feeder wires. Since the foam base of the module is over an inch thick, a coat hanger was used as a drill bit to make it all the way through. Cut a straight portion from a wire coat hanger at an angle. This improvised tool is used by various installers to drill through a carpeted floor in homes. 22 gauge solid wire is bent at a 90 degree angle and soldered with a low wattage soldering iron to the webs of the rails. For use with DCC, we did not want the power routing features of the Peco switches to cut power off on any of the back tracks. All sections on both sides of the new switches had feeders attached. It is wise to use different colors of wire to keep the plus and minus polarity straight when you are working underneath to attach them to power. Similarly, when attaching feeders to the main line tracks, go out and buy red, yellow, and blue wire. This lessens the chance of a mistake when you are constructing the module, and it helps in troubleshooting when there is an electrical problem at a show. |
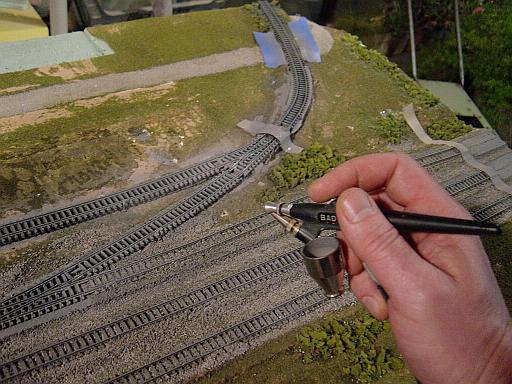
| After feeder wires are soldered to the rails, it is now time to paint the track. We contined with the same color gray to make a homogenous effect. Use masking tape to cover the switch points and nearby scenery to avoid overspray. Masking tape was also applied to the ends of the rails on the main line tracks. This is where rail joiners have to slide on to make connections with the adjoining modules, so there must be no paint there. |

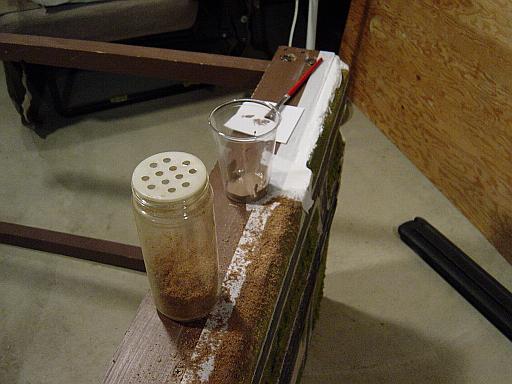
| This ballasting tool is made for N scale. It leaves the proper amount of ballast between the rails and down the slopes of the cork roadbed profile. Woodland Scenics may not make the best N scale ballast, but it is readily available. |
| New N scale size ballast has been applied where the tracks are, leaving the more coarse original ballast exposed between the main lines. One secret to getting the ballast the way you want it is to use a soda straw taped to the end of a vaccuum cleaner wand. This gives you fine control and you can remove a few grains of ballast at a time. This is most important between the rails, where N scale wheels cannot tolerate any grains of ballast getting in the way. You really cannot use a brush to smooth ballast in N scale, because it is so fine that you will leave brush marks. You are pretty much stuck with how it looks after you apply the ballast. |
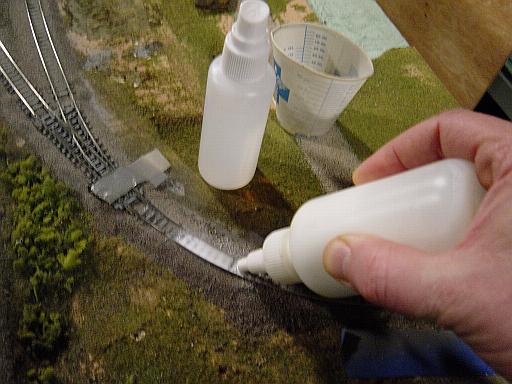
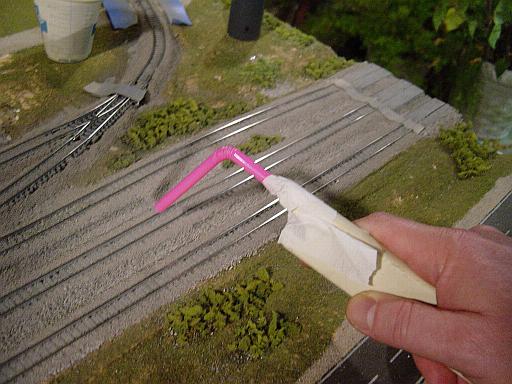
| To secure the ballast, use a misting pump sprayer to wet it with rubbing alcohol. Then use an applicator to flow diluted glue between the rails. You will know you have enough when the glue floods out, thoroughly saturating the ballast. If you don't use enough glue, then a crust will form on the outer layer, leaving loose ballast underneath. Once that crust gets broken, you have an unsightly mess that will need to be repaired. Let all this dry for at least 24 hours. Don't bother touching it to see if it is dry. |
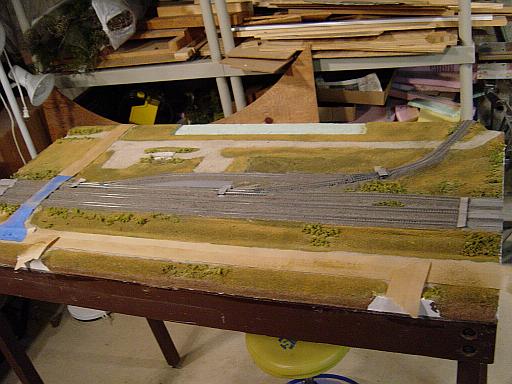
| This is an overall view of the module after all the new track is installed, painted, and ballasted. The summer green color has been replaced with brown colors. All of the trees have been removed. We want this module to look like early winter in the Illinois prairie. No one seems to model anything but leafy green summertime on N-Trak modules, or home layouts either. Why not be different? |
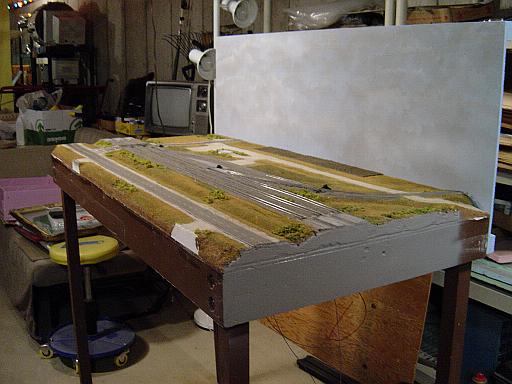
| It occurred to us that the module frame should reflect the overall color tones of the scenery itself. The dark brown paint on the wood frame was in bad shape. We took an ordinary can of primer gray spray paint and let 'er rip. It looked pretty good, so we continued with the gray all around the module. |