Back to the Photo Gallery

Foam Board X Base for a Small Foam Layout

All photos by Glenn Koproske April 25, 2012


MVNS acquired a built up Woodland Scenics Scenic Ridge layout at a local garage sale. Now it's time to fix it up. You will recall that it is made entirely out of expanded white foam with just a 1/2" base. And no means of support. The new height of the layout was determined by taking a folding table and putting copy paper boxes on it, with the layout on top of that. The bottom of the layout is 38" from the floor, and track height is 42". We used a six year old kindergartener to determine whether this is a good height to comfortably play with trains.


On the advice of MVNS member Fred Houska, we purchased a 4x8 sheet of 5 mm plywood underlayment. We put the good side on the floor and set the layout on top. We traced the outline of the 3x6 layout on the plywood. Ali Shahriary used a circular saw to cut it to fit. Lowes had a rack of Liquid Nails extra strength construction adhesive right there, so we used 2 tubes worth to glue the board to the bottom of the layout. Wood to foam, and the adhesive grabbed right away and held tight. We learned a long time ago never to use Liquid Nails for Foam Board or Latex Liquid Nails. We have never had any problems with their products melting foam board. Must be an urban legend.


This layout stores very nicely upright sitting on its back side. We left a pigtail wire sticking out. The plywood does not add all that much weight to the layout. The extra support it provides will pay off in the long run. The sides of the layout are covered with paster cloth. We will use pre-colored vinyl wall covering and corner molding to cover up all 4 sides and add resilience when moving the layout.


We bought two 4x8 sheets of 2" extruded foam insulation board while we were at the store. These are the key components of the support system. Each sheet was cut in half. We measured and cut off a 10" section was removed from one end for the layout height of 38". Then a 2" wide notch was cut halfway down the middle of each piece. We used a saber saw to make the cuts, running it along a straightedge. Do not try to freehand these cuts. You want all the edges to be true. A Surform tool will smooth out any irregularities.


Now let's start to assemble the foam board pieces. Our able assistant begins the process.


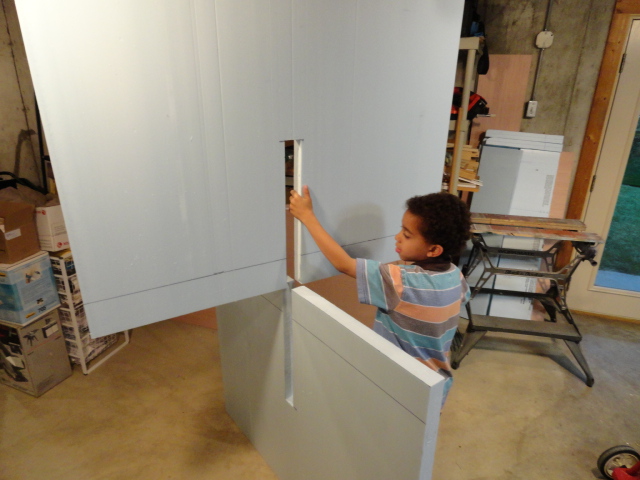
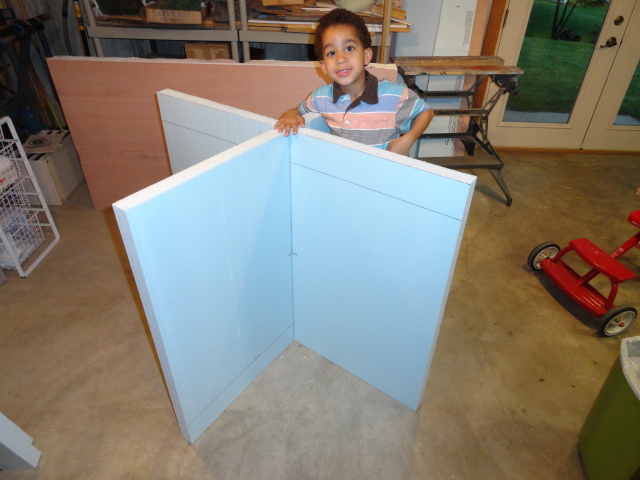
Slide one board onto the other, slot to slot.


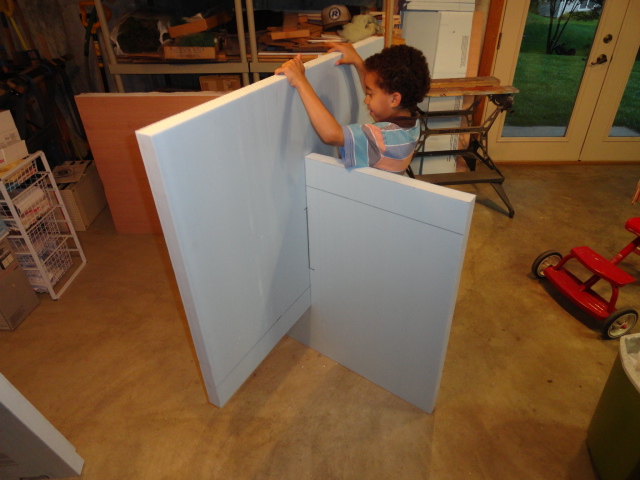
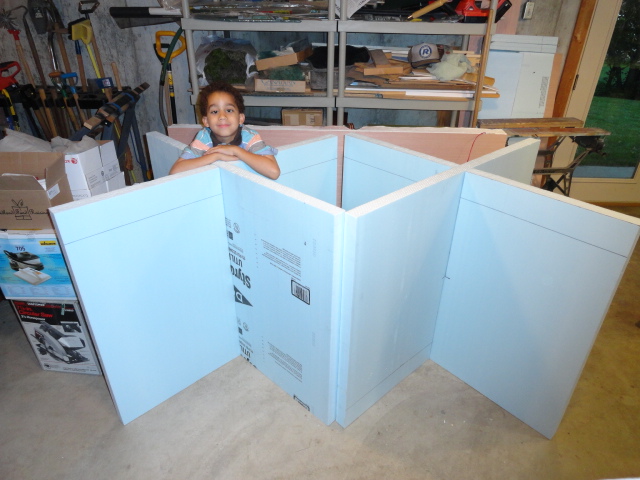
The foam board sections are now locked together to form a square X. Simple, sturday, self supporting, and using no tools. When taken apart, all these sections store flat, up against a wall or under the bed.


All 4 sections are put together and placed next to each other. This is what the layout will sit on.


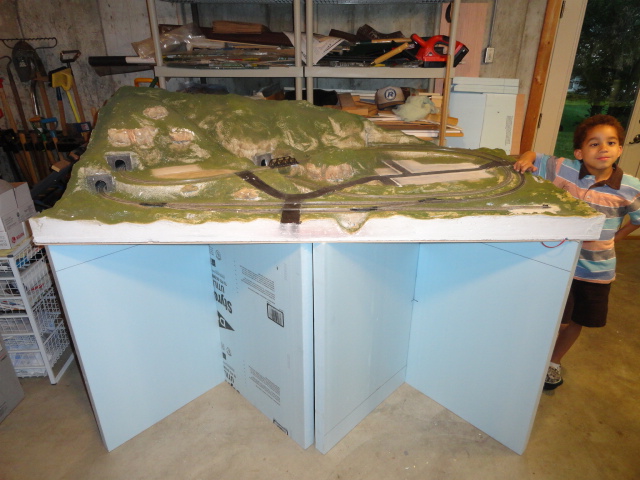
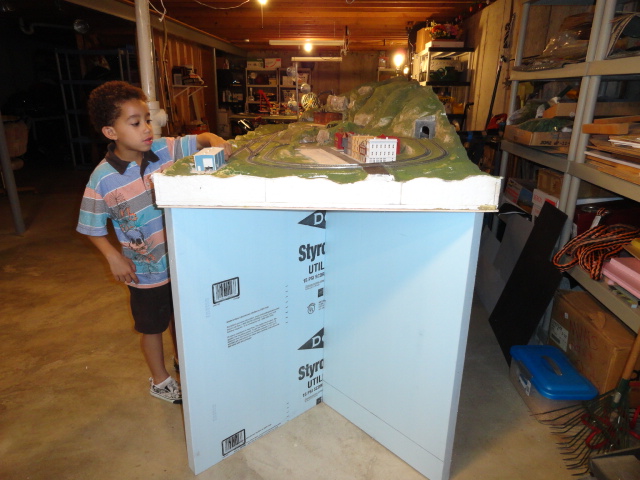
After lifting the layout onto the X supports, we are done!


End view of the layout on the X base. The kindergartener test shown here indicates that this is an ideal height for a layout. There is little chance to accidentally kick the support sections. The layout does not wobble. The next steps will be to cut some convenient notches on top to run the line cord for the power pace. Also to paint all surfaces and edges of the foam board with latex house paint. At the returned paint rack at Lowes they had a gallon of satin black for 5 bucks.


Back to the Photo Gallery